
To use your Email Subscribe Widget, you will have to burn your blog's feed on Google Feedburner, know how.
Advertisements
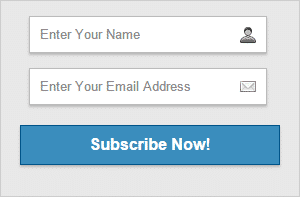
Kesa Hai Email Subscribe Widget
This widget is where we will use the feed of our Feed burner. If anyone subscribes we can see it in our feedburner account.
Copy the code and navigate to the Layout > Page Elements screen in Blogger.
Select Add a Gadget in the area you wish the subscribe by email widget to appear (in most cases this will be the sidebar).
Choose HTML/Javascript widget
Paste the widget code into the content box
Click on the Save Button
Reposition the widget if necessary. A good place is at the top of the right sidebar and Save.
Click on View Blog to see your new email form in your blog
<style>
#HMH-FeedBurner {
background: #E8E8E8;
border: 1px solid #CCCCCC;
padding: 15px 0;
text-align: center;
width: 298px;
}
#HMH-FeedBurner input[type="text"] {
border: 1px solid #BBBBBB;
font-size: 13px;
margin: 0 0 15px 0;
padding: 10px;
width: 80%;
color:#888;
}
#HMH-FeedBurner input {
box-shadow: 0 2px 2px #BBBBBB;
-moz-box-shadow: 0 2px 2px #BBBBBB;
-webkit-box-shadow: 0 2px 2px #BBBBBB;
}
#name {
background: url(http://i.imgur.com/XrHTe.png) no-repeat scroll right center #FFFFFF;
}
#email {
background: url(http://i.imgur.com/2BCD0.png) no-repeat scroll right center #FFFFFF;
}
#HMH-FeedBurner input[type="submit"] {
background: #3B8DBD;
border: 1px solid #005588;
color: #FFFFFF;
cursor: pointer;
font-size: 16px;
font-weight: bold;
height: 40px;
margin-top: 5px;
padding: 8px 0;
text-transform: capitalize;
width: 87%;
}
#HMH-FeedBurner input[type="submit"]:hover {
background: none repeat scroll 0 0 #005588;
}
</style>
<!-- HMH.pe FeedBurner Subscription Form -->
<div id="HMH-FeedBurner">
<form onsubmit="window.open('http://feedburner.google.com/fb/a/mailverify?uri=HindiMeHelp', 'popupwindow', 'scrollbars=yes,width=550,height=520');return true" target="popupwindow" method="post" action="http://feedburner.google.com/fb/a/mailverify">
<input type="hidden" name="uri" value="HindiMeHelp" /><input type="hidden" value="en_US" name="loc" />
<input type="text" id="name" name="name" onfocus="this.value=''" value="Enter Your Name" placeholder="Enter Your Name" />
<input type="text" id="email" name="email" onfocus="this.value=''" value="Enter Your Email Address" placeholder="Enter Your Email Address" />
<input type="submit" value="Subscribe Now!" id="submit" name="submit" />
</form>
</div>After copying and pasting the code in the widget, you will have to remove your Feedburner username and enter your own.
To change your username, type Ctrl+ then search MyUserName or enter your username there. 2 places have to be changed.
- http://feedburner.google.com/fb/a/mailverify?uri=MyUserName
- value=” MyUserName “
Note: Email Subscribe Widget will work as soon as Email Subscription is enabled on your Feedburner .
Step 4. After entering your feedburner in the code, save the widget .
Check Your Subscribe By Email Form is Working Correctly
Once your subscribe by email widget is safely installed your form is ready for use. I suggest you test drive it to make sure it is performing correctly. Besides if you sign up you will have at least one subscriber right? Also you may want to regularly check who is subscribing to your blog by email by navigating to the Feedburner > Publicize page for your blog.
1. On the homepage of your blog enter your email address and click on the Subscribe button.
2. You will be take to a Feedburner Email Request screen with a captcha check for spam. Enter the sequence of alphanumeric characters into the text box.
3. Click on the Complete Subscription Request button
4. You will now be informed that your request was successful and that you will need to click on the activation code in an email that has been sent to you.
5. Open your email program and retrieve the email and follow the activation link. You will then receive an Email Subscription Confirmed notice from Feedburner. As the notice points out you will only receive an email if you make a post so you will need to get cracking on writing your next post.
In this tutorial you have learned how to add an email subscription form to a Blogger Blogspot blog so that your readers can enjoy receiving your most recents posts directly to their mailbox. Allowing visitors to sign up for your feed via email will promote your blog and can easily turn a new visitor into a regular follower. An alternative to an email subscription form is to insert a subscription link into your blog. I find a good place for an email subscription link is after each post to encourage visitors to sign up for my feed.